Ballistics Combat in Warhounds
Own trajectories, cover breaks, and overwatch cones—without fake hit-percent theater.
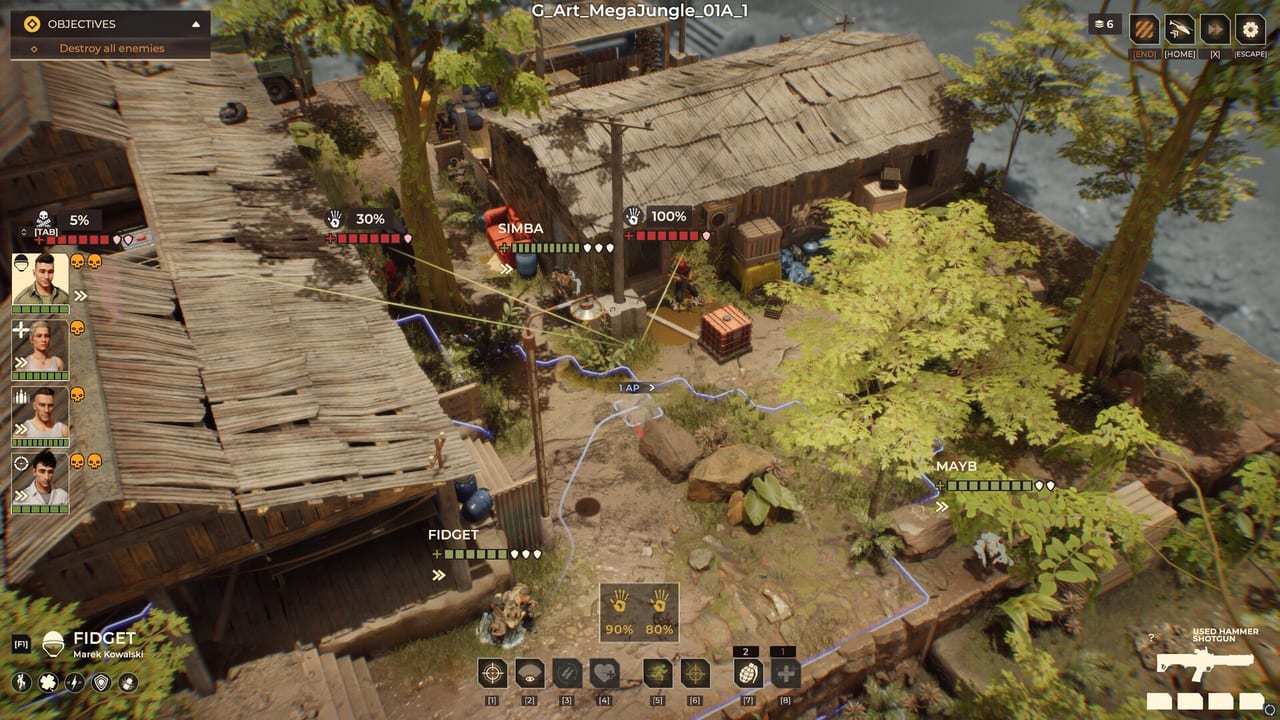
Warhounds sells itself on lethal, readable shooting. This guide explains how to fight on Steam’s single-player tactics ruleset: real ballistics, no point-blank misses, per-shot burst penalties, projectiles that keep traveling after a miss, destructible cover, vertical maps, and cone overwatch. Pair it with Getting Started for roster basics, Controls for preview habits, and Early Campaign when you need to translate clean fights into a surviving company. Return to the Guides Hub anytime you need the full tutorial map.
Honest ballistics, not fake RNG theater
Classic percentage tactics train you to stare at a to-hit number and pray. Warhounds asks you to evaluate geometry: distance, line of fire, elevation, weapon behavior, and the props between muzzle and target. Close-range attacks are not supposed to whiff because a hidden die hated you. When a shot is guaranteed by positioning, trust the plan—then manage the variance that still exists inside damage ranges, critical hits, and grazes.
That distinction matters. The game is not claiming zero randomness forever. It claims the uncertainty you feel should come from systems you can see: recoil across a burst, cover that still blocks part of a silhouette, a graze instead of a clean center mass. Your job is to remove excuses from the board before you commit the activation.
Per-shot penalties inside a burst
Bursts are evaluated round by round. Even with a clean line, later projectiles can carry growing accuracy penalties. A common teaching example from the developers: when the geometry is guaranteed, a three-round attack may resolve like 100%, then 90%, then 80%. Plan around that curve.
Practical habits:
- Take the high-value first round seriously. If you only need the opener, do not auto-dump the whole mag for cinema.
- Expect long sprays to wander. Machine Gunners still excel at denial, but treating every bullet as equally precise is how you invent “bad luck.”
- Combine burst discipline with flanking. A shorter, cleaner engagement beats a hopeful full auto through soft cover.
- Remember damage still rolls inside a known range per connecting shot. Landing three rounds on a starting-style rifle can swing across a published min–max band—so finishing blows need margin, not vibes.
Missed bullets continue on their path
When a round fails to connect with the intended target, it does not politely vanish. The projectile continues along its trajectory. That rule creates both risk and opportunity.
- Stacking enemies in a lane can punish the backline when the front target is grazed or missed.
- Friendlies beyond the aim point can become accidental victims if you fire through messy geometry.
- Destructible props in the path may absorb or transform the fight—sometimes helping you, sometimes wasting the only activation you had.
Before you confirm, ask what sits on the far side of the miss cone. Warhounds rewards commanders who think one object deep.
Cover is a resource you can spend
Destructible cover is not flavor. Soft barriers that look safe on turn one can be shredded by sustained fire or explosives, exposing the operator you parked “just for this overwatch.” Hard cover that blocks a sniper lane might be the exact problem your Grenadier exists to solve—see class notes in Getting Started and kit priorities in Base Management.
Tactical checklist:
- Identify whether the cover is temporary or worth respecting for multiple enemy turns.
- Decide if you will bypass (flank, elevation, smoke) or break (focused fire, grenades).
- Pre-place the next tile your merc will occupy after the wall dies.
- Deny the same trick to enemies: do not gift them a Machine Gunner angle into your newly opened room.
Elevation and flanking win turns
Vertical gameplay is part of the ballistics fantasy. Height improves lines, reveals targets hugging low props, and lets Snipers contribute without standing in the same killbox as your Assault. Flanking changes which edges of cover still matter. Calculate flank angle the way the store page promises: as a deliberate plan, not a bonus you notice after the fact.
Use Specialists’ scanners and drones when the next corner is unknown. Optical camo and smoke are not shame tools; they are how you cross a cone that would otherwise delete a veteran mid-campaign.
Cone overwatch, not abstract tile magic
Overwatch in Warhounds is cone-based. You are claiming a volume of space with facing and width, not sprinkling a buff on a single floor tile. That design rewards Machine Gunners and careful end-turn discipline.
How to place cones well:
- Aim at funnels: doors, stair mouths, bridge chokepoints, and the lane enemies must take after you break their cover.
- Avoid “comfort cones” that face empty courtyards while the objective path sits behind you.
- Move, then watch. Relocating into a better cone often beats shooting a mediocre burst and ending turn exposed.
- Probe with scouts or gadgets before you walk a full squad into an unseen enemy cone.
If overwatch keeps clipping you, reopen Controls and practice previewing cones until reading them is muscle memory.
Class jobs inside the ballistics sandbox
- Assault — Convert guaranteed close shots into finishes. Arrive after smoke or after cover breaks, not before.
- Specialist — Sell information and denial. Scanners and drones reduce blind activations; smoke and camo defeat cones.
- Sniper — Punish height and open lanes once teammates create them.
- Machine Gunner — Own the best cone on the map. Your best turn might be zero kills and three denied approaches.
- Grenadier — Spend explosives on cover problems and clustered geometry, not on healthy targets you could have flanked.
A clean combat turn template
- Scout or recall last-known cones.
- Move the piece that creates a new angle (height, flank, cover break).
- Take the highest-certainty shot that advances the objective.
- Place overwatch cones on the counterattack path.
- Extract mindset: if the contract is complete, stop farming side fights inside a 25–40 minute mission shell.
Linking combat to the campaign
Perfect shooting cannot save a campaign that ignores medical downtime. After nasty maps, visit Base Management before you buy another vanity optic. For pacing and contract choice that keep ballistics practice sustainable, use Early Campaign.
When a fight feels unfair, replay the geometry in your head before you blame the engine: burst step-downs, continuing misses, shredded cover, and cone facing explain most “RNG” stories in Warhounds. Master those four, and the battlefield starts answering to you.
Train one habit per mission—burst discipline one night, cone placement the next—until honest ballistics feels like a language you speak under pressure, not a trailer slogan.
Frequently Asked Questions
Quick answers to the most common questions.
Do point-blank shots miss in Warhounds?
They are not supposed to miss from bogus randomness. Close, clear shots are meant to land so positioning and planning decide the turn.
Why did later rounds in my burst miss?
Bursts resolve per projectile with rising accuracy penalties after the first round, even on a strong initial line. Shorter, cleaner engagements often outperform full sprays.
What happens when a bullet misses?
The round continues along its trajectory. It can still hit something beyond the target—enemy, prop, or a poorly placed ally.
How is overwatch different from tile-based games?
Warhounds uses cone overwatch. Facing and coverage volume matter, so place denial on real approach lanes instead of a single abstract square.
Is there still any randomness in combat?
Yes—damage ranges, crits, and grazes still vary—but the fantasy is readable ballistics and geometry, not hidden percentage theater at point-blank range.